I have a love hate relationship with reupholstering. It's just so tedious and time consuming. Please bear in mind that I am in no way a professional, I just enjoy knowing when I find an old dirty piece, I can take it home and make it usable again without breaking the bank.
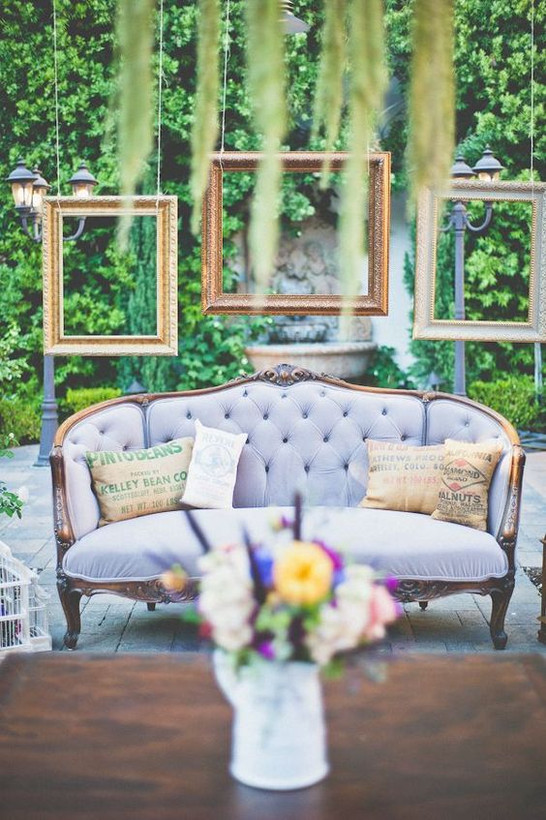
I found this Antique Sette on OfferUp. The seat was in good condition with no sagging. There were some cracks and broken structural pieces under the fabric. I had great faith that my hubby could fix those issues no swear. He used metal brackets to make the settee structurally sound again. I used a cream microfiber materiel with a french linen gray gimp trim and left the wood as is. This was an old piece with mohair and the works, it just felt wrong to paint the wood.
Tools needed:
- An air compressor and an pneumatic staple gun. I don't recommend doing this with a hand held stapler. They just aren't powerful enough and your poor hands will be so sore with the amount of staples you'll be using.I have any old air compressor I bought on craigslist and I use it for painting, filling car tires, and tons of jobs around the house. They aren't cheap but Harbor Freight hasgreat deal on air compressors and staple guns.
- An air compressor and an pneumatic staple gun. I don't recommend doing this with a hand held stapler. They just aren't powerful enough and your poor hands will be so sore with the amount of staples you'll be using.I have any old air compressor I bought on craigslist and I use it for painting, filling car tires, and tons of jobs around the house. They aren't cheap but Harbor Freight hasgreat deal on air compressors and staple guns.
http://www.harborfreight.com/8-gal-2-hp-125-psi-oil-lube-air-compressor-69667.html
http://www.harborfreight.com/20-gauge-wide-crown-stapler-68029.html
- Staples, a lot of staples. I prefer longer staples, they are more secure. You can find these at any hardware store or even Walmart.
https://www.walmart.com/ip/ARROW-FASTENER-50624-T50-Staples/14962207
- Upholstery tack remover
Trust me you need this and it's so inexpensive. You will be removing thousands of nails or staples and your hands and sanity will thank you. You can try using a screwdriver for removing staples, this is fine for small jobs like kitchen chair. I found the screwdriver all leaves marks in your pieces wood frame, not ideal.
https://www.amazon.com/Great-Neck-TL4C-Tack-Lifter/dp/B00004Z2MI/ref=sr_1_3?ie=UTF8&qid=1493660870&sr=8-3&keywords=upholstery+tack+remover
- Fabric
It's best to go with a home decor fabric or upholstery fabric. Other fabrics are just too lightweight and will show wear quickly. Some of my favorite fabrics to use are linen drop cloths or soft crushed velvet's. Fabric can be the most expensive part of this process if you have a large piece of furniture. I always use a JoAnns coupon or shop the discounted home fabric section. Always make sure you have more than you need for mistakes. I use this chart to help me get the approx. amount.
https://www.creatingreallyawesomefunthings.com/f-r-e-e-upholstery-charts/
- Batting
I use batting to add a little extra cushion and to smooth out whatever is "stuffing" the piece has.
-Trim, Nail heads, or Cording
I usually opt for the trim or nail head route. Cording is what you see used most often and it great if you like to sew:) I like to use a gimp trim that I can glue on with hot glue. It is very durable. When it comes to nail head trim, I advise you to buy it in long strips. It makes the job so much easier, and there is no worry about getting the spacing correct, it's done for you.
- Hot Glue Gun and Glue or Rubber Mallet for Nail head Trim
I'm going to walk you through my basic steps and tricks for re upholstery.
1st- Know your limits. When I'm looking for a piece I know that my weakness is sewing, big time! Its just not my cup of tea. I try to look for sofas or chairs that don't have separate cushions that I have to sew covers for. Maybe you're great at sewing so it's a none issue. Awesome! That opens so many doors for you. I also know that tufting can be a huge pain so I try to steer away from that as much as possible. Also be weary of structural problems like sagging springs and broken wood frames.
2nd- Take photos of your furniture. This should really be done after every step if you're new to upholstery. When you get yourself in a pickle and you can't remember how something was put together you can go through your photos and have a look.
3rd- Consult with youtube. I try to find a video of a professional reupholstering something similar to my furniture piece.
4th- Label every piece of fabric for example back, front, left arm, right arm, etc.
5th- Remove the fabric by taking out all the staples or nails
6th- Keep every piece of fabric you took off, this will be your pattern for your new fabric.Cut out new fabric using the old. Be sure to label the back off your new fabric so you know where it goes.Whenever I do this step I always think "I'll cut a little extra around the edges to give me some room for error". This usually causes me problems later on. I always end up with too much fabric and it causes it to bulge or wrinkle.
7th- Staple your new fabric on. I usually start with the bottom, front, back, then sides. I start in the middle of each fabric piece and work my way out to the edges.
8th- Use your trim to cover your staples
Hopefully, this was helpful and will inspire you to take on something that you might normally have to pass up on at the thrift store. Here is my end result, I'd love to see yours or hear your tips!


